
#Starting a Pear Desktop Project
This section shows how to generate, configure, and develop a Pear desktop project, in preparation for Making a Pear Desktop Application.
#Step 1. Initialization
Use pear init to create a new Pear project.
mkdir chat
cd chat
pear init ui --yes
This creates the base project structure.
package.json. App configuration. Notice thepearproperty.index.js. App entrypoint.ui/index.html. GUI entrypoint.ui/app.js. Main code.test/index.test.js. Test skeleton.
#Step 2. Verify Everything Works
Use pear run to verify everything works as expected.
pear run --dev .A directory or link needs to be specified with
pear run, here.denotes the current Project directory.
The app should open in development mode. In this mode developer tools are also opened.

#Step 3. Automatic Reload
To enable automatic reloading, add the following lines to app.js :
Pear.updates(() => Pear.reload())Run the app again using:
pear run --dev .Now Pear watches project files. When they change, the app is automatically reloaded.
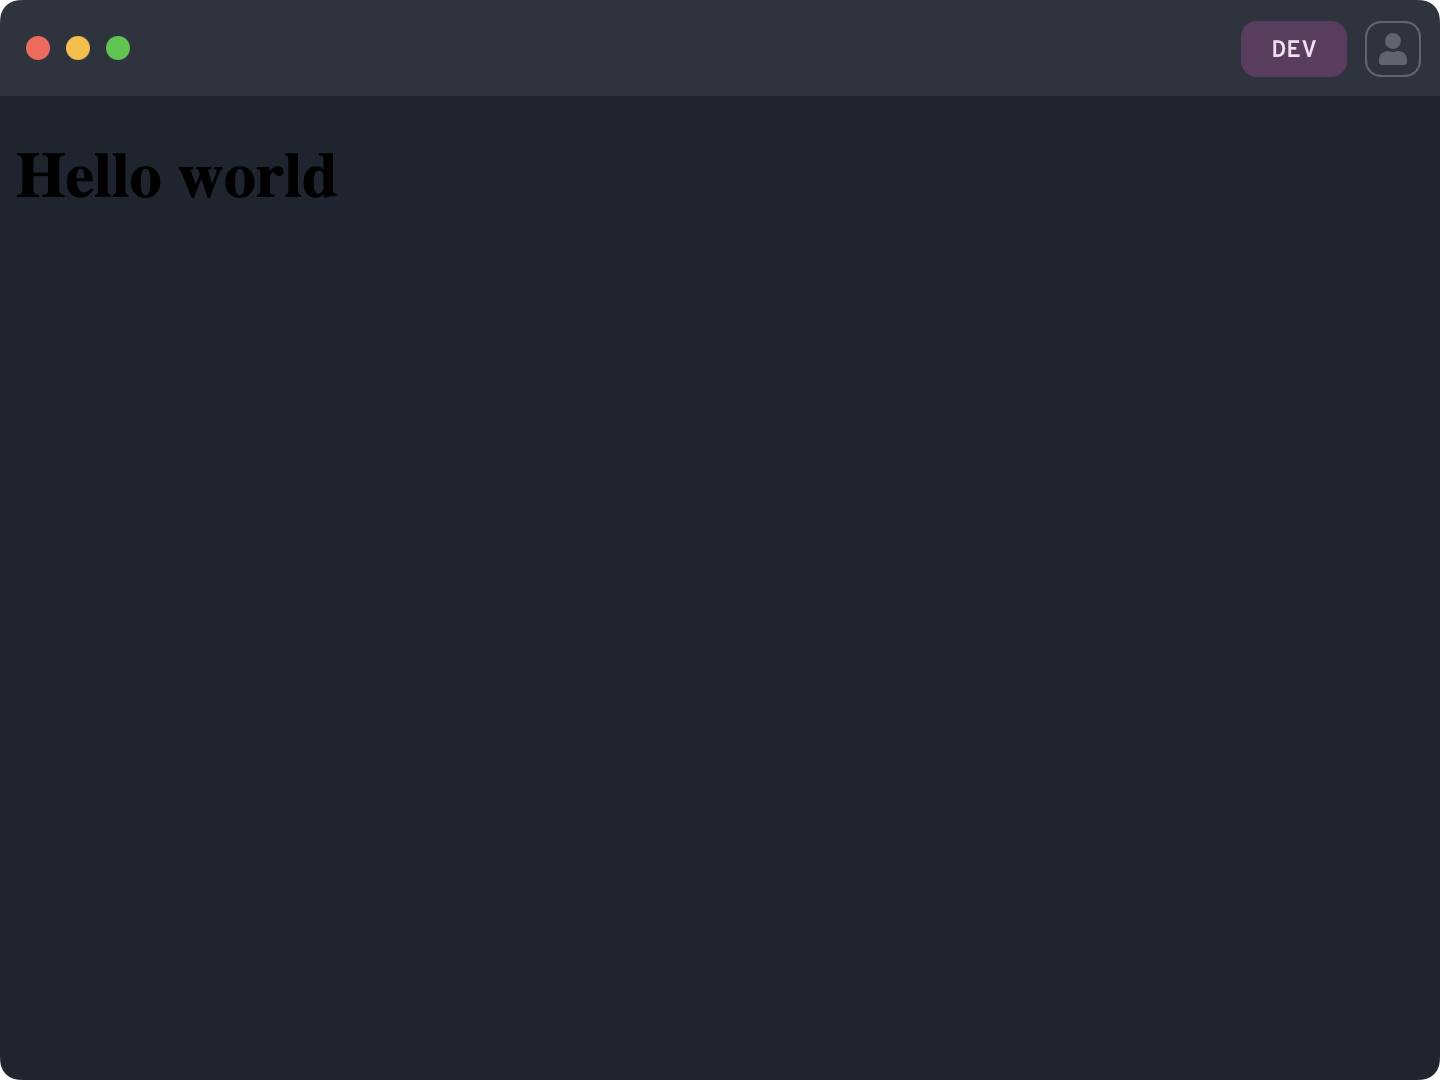
While keeping the pear run --dev . command running, open index.html in an editor.
Change <h1>desktop</h1> to <h1>Hello world</h1>.
The app should now show:
Live reload with hot-module reloading is possible by using the
pear.watchconfiguration and thepear.updatesAPI. The pear-hotmods convenience module can also be used.
#Step 4. Configuration
Application configuration is under the pear property in package.json
Open package.json and update it to:
{
  ...
  "pear": {
    "gui": {
      "height": 400,
      "width": 700
    }
  }
  ...
}
Close the app and re-run pear run --dev . to see the changes, the initial window size is different now.
See the Configuration Documentation for all options.